We’ve all been there—you turn the key (or press the start button), and instead of your engine roaring to life, you get… nothing. Maybe a faint click, maybe dim dashboard lights, but one thing’s clear—your battery is dead.
Jump-starting your car is one of the most useful skills every driver should know, and doing it correctly can save you from unnecessary damage or safety risks. Whether you’re stranded in a parking lot or helping a friend, here’s how to jump your car battery safely and efficiently.
What You’ll Need
✅ Jumper cables – At least 10-12 feet long, with well-insulated, heavy-duty clamps.
✅ A running vehicle – This will act as the donor car to supply power.
✅ A solid ground – Never jump-start on a wet surface or in standing water.
Step-by-Step Guide to Jump-Starting a Car
Step 1: Park & Prep
- Position the vehicles: Park the donor car nose-to-nose or side-by-side with the dead car, keeping them at least a foot apart to avoid any accidental contact.
- Turn off both cars: Make sure both vehicles are completely off before connecting cables. Engage the parking brakes for extra safety.
- Pop the hoods: Locate the battery terminals on both cars.
🚨 Safety Tip: If the battery is swollen, leaking, or has a strong sulfur (rotten egg) smell, do not attempt to jump-start it—this could indicate a dangerous chemical reaction.
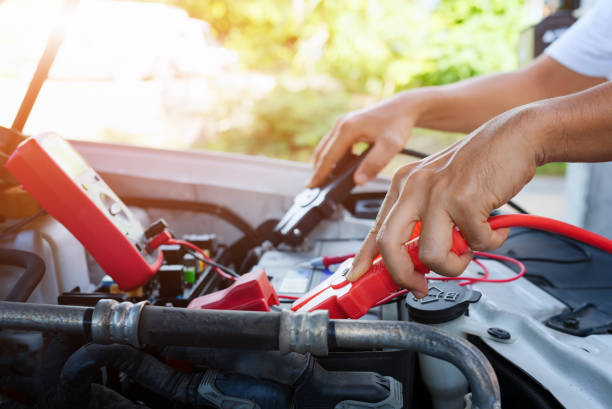
Step 2: Connect the Jumper Cables in the Correct Order
Jumper cables must be connected in a specific order to avoid short circuits or sparks.
- Red to Dead (+): Attach the red (positive) cable to the positive (+) terminal of the dead battery.
- Red to Donor (+): Attach the other red clamp to the positive (+) terminal of the good battery.
- Black to Donor (-): Attach the black (negative) cable to the negative (-) terminal of the donor car’s battery.
- Black to Ground: Instead of connecting to the dead battery’s negative terminal, clip the black clamp onto an unpainted metal surface (like a bolt on the engine block) on the dead car. This helps prevent sparks near the battery.
🚨 Never let the metal clamps touch while connecting!
Step 3: Start the Cars
- Start the donor car and let it idle for about 2-5 minutes to send charge to the dead battery.
- Start the dead car. If it doesn’t start immediately, wait another 2-3 minutes before trying again.
- Once the dead car starts, let both vehicles run for at least 5-10 minutes to help recharge the battery.
Step 4: Disconnect the Cables in Reverse Order
To safely remove the jumper cables, follow this sequence:
- Black (ground) from the previously dead car
- Black (-) from the donor car
- Red (+) from the donor car
- Red (+) from the previously dead car
Be careful not to let the clamps touch during removal.
Step 5: Let Your Battery Recharge
After jump-starting, drive the revived car for at least 15-30 minutes to allow the alternator to recharge the battery. If the car dies again shortly after, you likely have a battery or alternator issue that needs further diagnosis.
Troubleshooting: What If Your Car Won’t Start?
If your car doesn’t start after multiple attempts, here are some possible reasons:
🔴 Loose or corroded battery terminals: Check for buildup and tighten connections.
🔴 Completely dead battery: Some batteries are too drained to jump—consider a replacement.
🔴 Bad alternator: If the car starts but dies shortly after, the alternator may not be charging the battery.
🔴 Starter issue: A rapid clicking noise might mean the starter motor is failing.
If your car still won’t start, it’s time to call for roadside assistance or have your battery and electrical system checked by a professional.
Final Thoughts
Jump-starting a car is a simple but essential skill that can save you time and stress in an emergency. By following these steps, you can safely get back on the road while minimizing the risk of damage to your car’s electrical system.
Have any questions or a jump-start horror story? Drop a comment below!


Leave a comment